网站数据备份

2019-08-05-网站数据备份

1. 将网站数据备份至GitHub

CSDN 参考文章
使用hexo,如果换了电脑怎么更新博客?

1.1 具体操作:

1.1.1 情况1, 新建博客

  • 创建仓库: http://username.github.io

  • 创建两个分支: master 与 hexo(hexo 分支:保留源码(markdown、配置、主题等)master 分支:自动接收部署的 HTML)

  • 设置 hexo 为默认分支(原始文件,只需要手动管理这个分支上的Hexo网站文件)

  • 使用

    1
    git clone git@github.com:username/username.github.io.git  # 拷贝仓库

  • 在本地 http://username.github.io文件夹下通过Git bash依次执行

    1
    2
    3
    4
    npm install hexo -g
    hexo init
    npm install
    npm install hexo-deployer-git # 此时当前分支应显示为hexo

  • 修改_config.yml中的deploy参数, 分支应为master;

  • 依次执行

    1
    2
    3
    git add .
    git commit -m "XXXX"
    git push origin hexo # 提交网站相关的文件

  • 执行hexo g -d生成网站并部署到 GitHub 上

1.1.2 情况2, 已经有部分博文部署到git但没有备份分支

  • 创建 hexo 分支, 并设置为默认分支

  • git clone git@github.com:username/username.github.io.git到本地, 删除除了 .git 以外的文件;

  • 复制原有的博客源文件, 注意除了.deploy_git, 并创建 .gitignore

    1
    2
    3
    4
    5
    6
    7
    .DS_Store
    Thumbs.db
    db.json
    *.log
    node_modules/
    public/
    .deploy*/

  • 然后执行

    1
    2
    3
    git add .
    git commit -m "add hexo branch"
    git push

1.2 注意:

If you’re using GitHub Free and change a repository’s visibility from public to private, you’ll lose access to features like protected branches and GitHub Pages.

Any published GitHub Pages site will be automatically unpublished. If you added a custom domain to the GitHub Pages site, you should remove or update your DNS records before making the repository private, to avoid the risk of a domain takeover. For more information, see “Adding or removing a custom domain for your GitHub Pages site.”

help github

1.3 设置域名

1.4 CDN加速Github Pages

1.4.1 又拍云的CDN

  1. 又拍云CDN配置文档

    • 又拍云联盟

      又拍云联盟用户每月独享优惠加入又拍云联盟,按步骤完成申请,即可获得10GB免费存储空间+15GB免费CDN流量

  2. 配置CDN服务

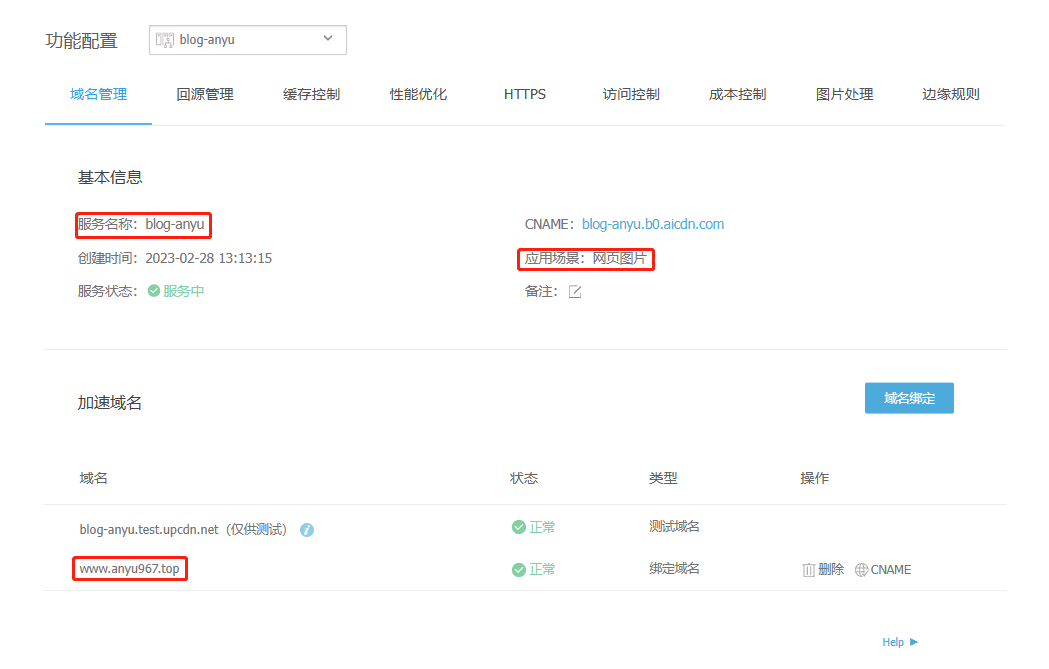
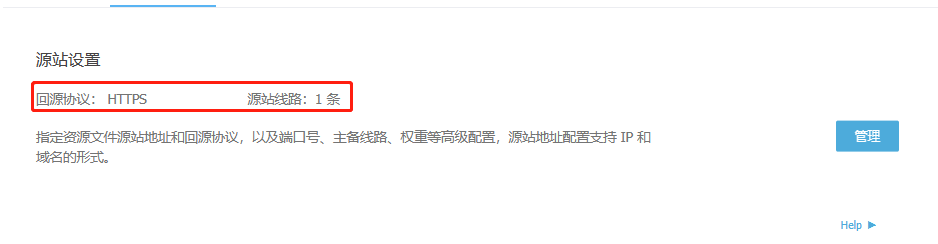
    • upyun配置
    • 智能压缩 开启 Gzip 和 Brotli
    • HTTP 302 调度
    • HTTPS 配置
    • TLS 1.3
    • WebP 自适应
  3. 腾讯云域名配置

    • 增加又拍云提供的CDN域名
    • 国外增加GitHub分配的域名
    • 参考文档
  4. Github Pages配置

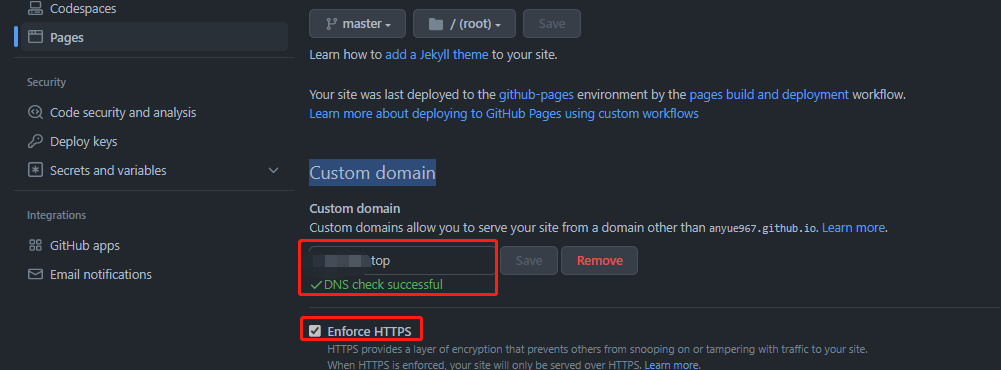
    • source目录下增加CNAME文件写上域名
    • Github Pages的settings下Custom domain配置域名,开启htpps
1.5 Git Hook 配置

1.5.1 Server端配置

1
2
3
4
5
6
# 安装 git 和 nginx
sudo yum install -y git nginx

# 启动 nginx 并设置开机自启
sudo systemctl start nginx
sudo systemctl enable nginx
1
2
3
4
5
6
7
8
9
10
11
12
13
14
15
16
17
# 创建 blog 用户
sudo adduser blog
# 设置密码(或者直接用 SSH 密钥免密,下面会讲)
sudo passwd blog

# 把仓库和网站目录的所有权交给 git 用户
sudo chown -R blog:blog /var/repo
sudo chown -R blog:blog /var/www/blog

# 裸仓库目录(接收 git push)
sudo mkdir -p /var/repo
# 网站目录(nginx 实际读取的文件)
sudo mkdir -p /var/www/blog

# 初始化裸仓库,--bare 表示创建一个裸仓库,不包含工作目录
cd /var/repo
sudo git init --bare blog.git

1.5.2 配置 Git Hook 自动部署

1
2
3
4
5
6
7
8
9
10
11
12
13
14
15
16
17
18
19
20
21
22
23
24
25
sudo vim /var/repo/blog.git/hooks/post-receive

#!/bin/bash
# 原理:每次收到 push,就把最新代码 checkout 到 /var/www/blog,Nginx 直接读这个目录。
#!/bin/bash
git --work-tree=/var/www/blog --git-dir=/var/repo/blog.git checkout -f master
sudo chmod +x /var/repo/blog.git/hooks/post-receive

# 配置SSH免密登录
# 本地 Windows/Mac/Linux 都行(如果已经有Github密钥可以复用)
ssh-keygen -t rsa -b 4096
# 一路回车,生成 ~/.ssh/id_rsa 和 id_rsa.pub

# 本地执行
ssh-copy-id blog@你的服务器IP
# 或者手动操作:把本地 ~/.ssh/id_rsa.pub 内容追加到服务器 /home/blog/.ssh/authorized_keys

# 手动操作
# 切换到 git 用户
sudo su - git
mkdir -p ~/.ssh
chmod 700 ~/.ssh
vim ~/.ssh/authorized_keys
# 把本地 id_rsa.pub 的内容粘贴进来
chmod 600 ~/.ssh/authorized_keys

1.5.3 配置Nginx(HTTPS)

1
2
3
4
5
6
7
8
9
10
11
12
13
14
15
16
17
18
19
20
sudo vim /etc/nginx/conf.d/blog.conf

server {
listen 443 ssl http2;
server_name 你的域名.com;

ssl_certificate /etc/nginx/ssl/你的域名.pem;
ssl_certificate_key /etc/nginx/ssl/你的域名.key;

root /var/www/blog;
index index.html;
# ... 其他配置同上
}

# 80 跳转到 443
server {
listen 80;
server_name 你的域名.com;
return 301 https://$host$request_uri;
}

1.5.4 Hexo 配置

1
2
3
4
deploy:
- type: git
repo: blog@你的服务器IP:/var/repo/blog.git
branch: master

网站数据备份
https://anyue967.github.io/posts/f7bab86b.html
作者
anyu967
发布于
2019年8月5日
许可协议